Insignia Portable Air Conditioner Manual: A Comprehensive Guide
Welcome! This detailed manual expertly guides you through every aspect of your Insignia portable AC, offering a step-by-step journey to optimal cooling and comfort․
Congratulations on selecting an Insignia Portable Air Conditioner! This appliance is designed to provide convenient and efficient cooling for individual rooms, offering a flexible alternative to central air conditioning systems; This manual serves as your comprehensive guide, ensuring you fully understand and benefit from all its features․
We understand that setting up and operating a new appliance can sometimes feel daunting․ That’s why we’ve created this resource to walk you through each step, from unpacking and assembly to daily operation and maintenance․ Consider this manual your personal tutor, providing clear instructions and helpful tips․
This portable AC unit is engineered for ease of use and reliable performance․ It’s perfect for bedrooms, offices, or any space where you desire personalized climate control․ Prepare to experience enhanced comfort and a refreshing environment with your new Insignia appliance!
Safety Precautions & Warnings
Important Safety Information: Your safety is paramount․ Before operating your Insignia Portable Air Conditioner, carefully review these precautions to prevent injury or damage․ Always ensure the unit is placed on a stable, level surface to avoid tipping․ Never operate with a damaged cord or plug – replace immediately․
Avoid obstructing the air inlet or outlet, as this can cause overheating and malfunction․ Do not insert any objects into the unit․ Electrical safety is crucial; never use in wet areas or expose to water․ Disconnect from power before cleaning or performing maintenance․
This appliance is not intended for use by individuals with reduced physical, sensory, or mental capabilities without supervision․ Keep children and pets away during operation․ Failure to adhere to these warnings may void your warranty and pose a safety risk․
General Safety Rules
Read Before Use: To ensure safe and efficient operation of your Insignia Portable Air Conditioner, adhere to these general safety rules․ Always unplug the unit before cleaning, maintenance, or moving it․ Do not operate the AC with a damaged power cord or plug; contact customer support for assistance․
Ensure adequate ventilation in the room․ Avoid running the unit in extremely humid conditions for prolonged periods․ Never attempt to disassemble or repair the unit yourself – qualified personnel should handle repairs․ Keep flammable materials away from the air conditioner․
Do not use extension cords or multi-outlet adapters․ This appliance is intended for household use only․ Regularly inspect the unit for any signs of damage․ Following these rules will help maintain a safe operating environment and prolong the life of your AC․
Electrical Safety Information
Important Precautions: Your Insignia Portable Air Conditioner requires specific electrical considerations for safe operation․ This unit operates on a standard household electrical outlet․ Never use a damaged power cord; immediately discontinue use and contact support for replacement․
Avoid overloading the circuit with other high-wattage appliances․ Ensure the outlet is properly grounded to prevent electrical shock․ Do not operate the unit in wet or damp environments, including bathrooms or near water sources․ Always unplug the AC before performing any maintenance or cleaning․
If the power cord is damaged, it must be replaced by a qualified technician․ Improper grounding can pose a significant safety risk․ Regularly inspect the power cord for any signs of wear or damage․ Adhering to these guidelines will minimize electrical hazards and ensure safe usage․
Important Operating Warnings
Caution: To ensure safe and efficient operation of your Insignia Portable Air Conditioner, heed these crucial warnings․ Never operate the unit with a damaged power cord or plug․ Avoid blocking the air intake or exhaust vents, as this can cause overheating and reduce performance․
Do not insert any objects into the unit․ Keep children and pets away from the AC during operation․ Regularly check the water drain tank and empty it when full to prevent leakage․ Avoid prolonged exposure to direct airflow, as it may cause discomfort․
This appliance is not intended for use by persons (including children) with reduced physical, sensory or mental capabilities, or lack of experience and knowledge, unless supervised․ Always follow the instructions in this manual for optimal performance and safety․
Package Contents & Component Identification
Verify Contents: Upon unboxing your Insignia Portable Air Conditioner, carefully check that all components are present․ Your package should include the main AC unit, a window venting kit (including adjustable panels), an exhaust hose, a remote control, and this comprehensive user manual․
Key Components: The AC unit features control buttons, air intake vents, and a water drain port․ The exhaust hose connects to the unit and the window kit to expel hot air․ The remote control allows convenient operation from a distance․ The window kit adapts to various window sizes, ensuring efficient venting․
If any parts are missing or damaged, immediately contact customer support for assistance․ Retain the original packaging for potential returns or warranty claims․ Proper identification of each component is crucial for correct setup and operation․
What’s in the Box?
Unpacking Your AC: Inside the Insignia Portable Air Conditioner box, you’ll find several essential components designed for easy setup and effective cooling․ The primary item is, of course, the portable air conditioning unit itself, featuring a sleek and modern design․
Included Accessories: Alongside the unit, expect to discover a complete window venting kit, meticulously packaged to accommodate various window types․ This kit includes adjustable side panels for a secure fit․ A flexible exhaust hose is also included, connecting the unit to the window kit․ For convenient control, a remote control with pre-programmed functions is provided․
Finally, you’ll receive this detailed user manual, serving as your guide to optimal operation and maintenance․ Please verify all items are present before proceeding․ Contact support if anything is missing․
Identifying Key Components (Unit, Hose, Remote, etc․)
The Portable AC Unit: This is the core of your cooling system, housing the compressor, fan, and control panel․ Note the air intake vents on the sides and rear, crucial for proper airflow․
Exhaust Hose: The corrugated exhaust hose expels hot air outside․ Ensure a secure connection to both the unit and the window kit to maximize cooling efficiency․ Avoid kinking or bending the hose․
Window Kit: This adjustable kit seals around your window, providing an outlet for the exhaust hose․ The side panels extend to fit various window widths․
Remote Control: Offers wireless control of the AC unit’s functions, including power, mode, temperature, and fan speed․ Familiarize yourself with the button layout for convenient operation․ The display panel on the unit mirrors the remote’s functions․
Setting Up Your Portable Air Conditioner
Preparation is key! Before powering on, carefully unpack all components and inspect for any shipping damage․ Choose a location near a grounded electrical outlet, avoiding direct sunlight or heat sources․ Ensure ample space around the unit for optimal airflow – at least 18 inches on all sides is recommended․
Venting is crucial: Proper exhaust hose installation is vital for effective cooling; Securely attach the hose to the unit’s exhaust port and the window kit․ Extend the window kit panels to create a tight seal, minimizing hot air re-entry․
Power Up Safely: Once vented, plug the unit into a dedicated grounded outlet․ Avoid extension cords or adapters․ Allow the unit to stand upright for at least two hours before initial operation to allow the refrigerant to settle․
Venting Hose Installation – Window Kit Options
Effective venting is paramount for your Insignia AC’s performance․ The included window kit adapts to most standard double-hung or sliding windows․ Carefully measure your window opening to select the correct kit size․ Extend the side panels to fill the gap, ensuring a snug, airtight fit․
Hose Connection: Securely screw the exhaust hose into both the unit’s exhaust port and the designated opening on the window kit․ Tighten firmly to prevent air leakage․ Some models may offer adjustable window kit components for varied window types․
Sealing Gaps: Use the provided foam seals to fill any remaining gaps around the window kit, maximizing cooling efficiency․ Proper sealing prevents hot air from re-entering the room, optimizing performance․
Proper Placement & Airflow Considerations
Optimal placement significantly impacts cooling efficiency․ Position your Insignia portable AC near a window for venting, but avoid direct sunlight exposure․ Ensure at least 12 inches of clear space around the unit for unobstructed airflow – crucial for effective operation․
Avoid Obstructions: Do not place the AC near curtains, furniture, or walls that could restrict air intake or exhaust․ This restriction reduces cooling capacity and may cause the unit to work harder․
Room Size: Consider the room’s size; this AC is designed for specific square footage․ Using it in a larger space will diminish its cooling power․ Maintain a relatively closed room to maximize the cooling effect․
Initial Setup & Power Connection
Before powering on your Insignia portable AC, ensure the venting hose is securely connected to both the unit and the window kit․ A loose connection drastically reduces cooling performance and can cause operational issues․ Verify the window kit is properly sealed to prevent warm air from re-entering the room․
Power Connection: Plug the AC into a dedicated, grounded 115V AC outlet․ Avoid using extension cords or power strips, as they may not support the unit’s power requirements․ Confirm the outlet is functioning correctly before proceeding․
Initial Run: After connecting power, allow the unit to run on fan-only mode for a few hours to circulate air and eliminate any potential odors from manufacturing․
Operating Instructions & Control Panel

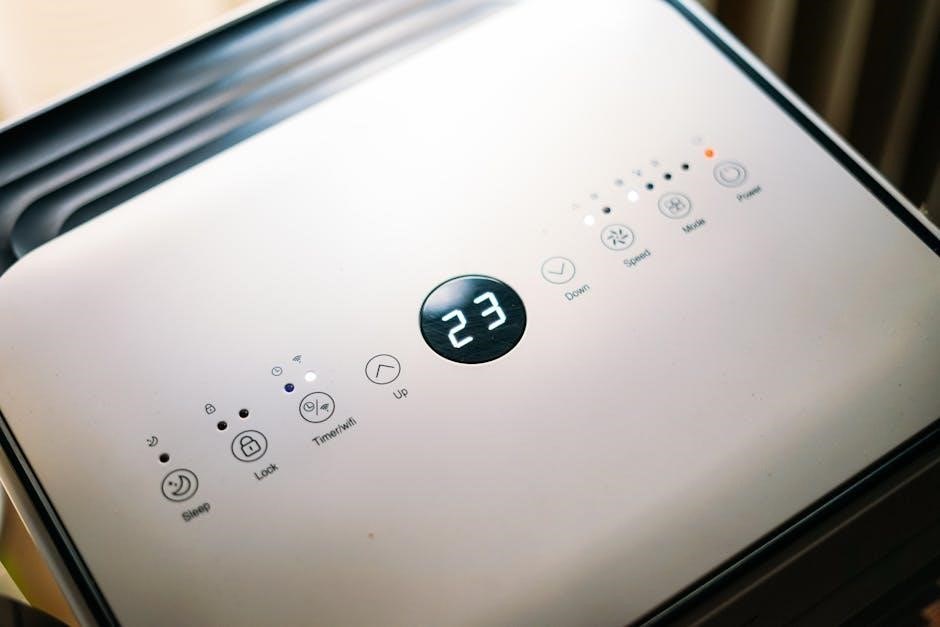
Familiarize yourself with the Insignia portable AC’s control panel for optimal use․ The panel features intuitive buttons for power, mode selection (Cool, Fan, Dry, Auto), temperature adjustment, and fan speed control․ A digital display clearly shows the set temperature and operating mode․
Mode Selection: Press the “Mode” button to cycle through the available options․ Cooling mode actively lowers room temperature, while fan mode provides simple air circulation․ Dehumidifying mode removes excess moisture, and Auto mode intelligently adjusts settings based on room conditions․
Temperature Control: Use the “+” and “-” buttons to set your desired temperature․ The unit will automatically adjust to maintain that level․ Explore the smart features for enhanced convenience and efficiency․
Understanding the Control Panel Buttons & Indicators
The Power button initiates or terminates operation․ The “Mode” button cycles through Cooling, Fan, Dry (Dehumidify), and Auto functions, each indicated by a corresponding illuminated icon; Temperature adjustment utilizes “+” and “-” buttons, displaying the set point on the digital readout․
Fan Speed control offers Low, Medium, and High settings, impacting airflow and energy consumption․ A “Timer” button allows pre-set operation durations, promoting energy savings and convenience․ The “Sleep” mode gradually increases temperature during nighttime for comfortable rest․
Indicator lights signal operational status – Cooling, Dehumidifying, Fan operation, and potential error codes․ Pay attention to these indicators for optimal performance and troubleshooting․

Cooling Mode Operation
To activate Cooling Mode, press the “Mode” button until the snowflake icon illuminates on the control panel․ Subsequently, use the “+” and “-” buttons to select your desired room temperature, displayed on the digital screen․ The unit will then initiate cooling, automatically adjusting fan speed for optimal performance․
For enhanced cooling, ensure the venting hose is securely connected to the window kit and the unit․ Avoid obstructions near the air intake and outlet for efficient airflow․ The compressor will cycle on and off to maintain the set temperature, conserving energy․
Adjust fan speed manually for personalized comfort․ Lower speeds are quieter, while higher speeds provide faster cooling․ Monitor the condensate drain tank and empty when full to prevent water overflow․
Fan Mode Operation
Engage Fan Mode by repeatedly pressing the “Mode” button on the control panel until the fan icon is illuminated․ In this mode, the unit operates solely as a fan, circulating air without actively cooling it․ This is ideal for ventilation or when cooling isn’t required․
Adjust fan speed using the “+” and “-” buttons to select from low, medium, or high settings․ Lower speeds provide a gentle breeze, while higher speeds offer stronger airflow․ Fan Mode consumes less energy than Cooling Mode․
Ensure proper airflow by keeping the air intake and outlet unobstructed․ This mode is beneficial for distributing air evenly throughout the room, improving overall comfort․ Regularly check and empty the condensate drain tank, even in Fan Mode, as condensation may still accumulate․
Dehumidifying Mode Operation
Activate Dehumidifying Mode by pressing the “Mode” button until the dehumidifier icon appears on the control panel․ This mode removes excess moisture from the air, creating a more comfortable environment, especially in humid climates․ Cooling is minimized during this operation․
Water Drainage is Key: The unit collects moisture in an internal tank․ Regularly monitor the tank level indicator and empty it when full to prevent overflow․ Alternatively, connect a drain hose for continuous drainage – consult the ‘Venting Hose Installation’ section for guidance․
Fan Speed Control: While dehumidifying, you can typically adjust the fan speed (low, medium, high) to control the rate of moisture removal․ Higher fan speeds remove moisture faster but consume more energy․ Ensure proper ventilation in the room during operation․
Auto Mode & Smart Features
Auto Mode intelligently adjusts cooling and fan speed based on the room’s temperature․ Select “Auto” on the control panel, and the unit will automatically maintain your desired comfort level, optimizing energy efficiency․ It continuously monitors and adapts, providing consistent cooling without manual adjustments․
Smart Features (if applicable): Some Insignia models offer smart capabilities, allowing control via a mobile app or voice assistants․ Download the Insignia app and follow the pairing instructions to remotely adjust settings, schedule operation, and monitor energy usage․
Timer Function: Utilize the built-in timer to schedule the unit to turn on or off automatically․ This feature enhances convenience and helps conserve energy․ Explore the app for advanced scheduling options and customized cooling profiles․
Maintenance & Cleaning
Regular maintenance ensures optimal performance and extends the lifespan of your Insignia portable AC․ Prioritize filter cleaning – check and clean the air filter at least every two weeks, or more frequently in dusty environments․ A clogged filter restricts airflow and reduces cooling efficiency․ Simply remove the filter, wash with mild soap and water, and allow it to dry completely before reinstalling․
Exterior Cleaning: Wipe down the unit’s exterior with a damp cloth regularly to remove dust and debris․ Avoid using harsh chemicals or abrasive cleaners․ End-of-season storage requires thorough cleaning and drying․ Disconnect the unit, empty any remaining water, and store it in a cool, dry place, covered to protect from dust․
Filter Cleaning – Frequency & Procedure
Maintaining a clean filter is crucial for efficient operation․ Insignia recommends checking the air filter every two weeks during regular use, and even more often if you have pets or live in a dusty area․ A dirty filter restricts airflow, reducing cooling performance and potentially damaging the unit․
Cleaning Procedure: First, power off and unplug the air conditioner․ Locate the filter access panel (refer to the component identification section)․ Gently remove the filter․ Vacuum loose dust, then wash with mild soap and lukewarm water․ Rinse thoroughly and allow the filter to air dry completely before reinstalling․ Never operate the unit without a clean, dry filter․
Unit Cleaning & Exterior Care
Regular cleaning extends the lifespan of your Insignia portable AC and maintains optimal performance․ Before cleaning, always power off and unplug the unit to prevent electrical shock․ Use a soft, damp cloth to wipe down the exterior surfaces․ Avoid harsh chemicals, abrasive cleaners, or solvents, as these can damage the finish․
Pay particular attention to the vents, removing any accumulated dust or debris with a vacuum cleaner brush attachment․ Do not immerse the unit in water or allow water to enter the internal components․ For stubborn stains, a mild detergent solution can be used, followed by a clean water rinse and thorough drying․ Ensure all parts are completely dry before reconnecting and operating the AC․
End-of-Season Storage Instructions
Proper storage is crucial for preserving your Insignia portable AC during the off-season․ Before storing, completely empty any accumulated water from the internal tank to prevent mold and mildew growth․ Thoroughly clean the filter and allow it to dry completely before re-installing or storing it separately․ Wipe down the exterior of the unit with a dry cloth․
Carefully coil and secure the power cord and exhaust hose to prevent damage․ Store the AC in a cool, dry place, protected from direct sunlight and extreme temperatures․ Cover the unit with a plastic bag or sheet to shield it from dust․ Ensure the storage location is well-ventilated․ Periodically check the unit during storage to ensure no moisture buildup occurs․
Troubleshooting Common Issues
Encountering problems? This section addresses frequent concerns with your Insignia portable AC․ If the unit isn’t cooling, first check the filter for blockage and ensure the exhaust hose is correctly installed and not kinked․ Verify the unit isn’t set to ‘Fan Only’ mode․ Error codes displayed on the control panel indicate specific issues; consult the manual’s code list for definitions and solutions․
Water leakage can occur due to improper drainage․ Ensure the drain plug is securely closed, or connect a drain hose for continuous drainage․ If issues persist, contact customer support․ Regular maintenance prevents many problems․ Always unplug the unit before troubleshooting․ For complex issues, avoid self-repair and seek professional assistance to maintain warranty validity․
Unit Not Cooling Properly
Experiencing insufficient cooling? Several factors could be at play․ Begin by inspecting the air filter – a clogged filter drastically reduces airflow․ Ensure it’s clean and properly installed․ Next, verify the exhaust hose is securely connected to both the unit and the window kit, free from kinks or obstructions․ Confirm the window kit is sealed effectively to prevent hot air from re-entering the room․
Check the thermostat setting; it might be set too high․ Also, ensure the unit isn’t operating solely in ‘Fan’ mode․ If the problem persists, allow the unit to run for a sufficient period, as it may take time to cool a larger space․ Avoid direct sunlight exposure, which can overwhelm the cooling capacity․
Error Codes & Their Meanings
Decoding error messages is crucial for effective troubleshooting․ “E1” typically indicates a sensor error – contact customer support․ “E2” signals an issue with the compressor, potentially requiring professional repair․ “E3” often points to a blocked exhaust hose or a problem with the window kit’s seal, hindering proper ventilation․ “E4” suggests a full water tank (if applicable), necessitating drainage․
“E5” can mean a motor malfunction, while “E6” may relate to a communication error within the unit․ Always unplug the AC before attempting any troubleshooting based on error codes․ Refer to the complete error code list in the appendix of this manual for a comprehensive understanding․ If an error persists after addressing the suggested solution, seek qualified assistance․

Water Leakage & Drainage Solutions
Addressing water leaks promptly prevents damage․ Ensure the unit is on a level surface; unevenness can cause drainage issues․ Regularly check and empty the water tank (if your model has one) – a full tank triggers auto-shutoff and potential leakage․ Inspect the exhaust hose connection for secure fitting; gaps can lead to condensation buildup and dripping․
If leakage persists, verify the window kit is properly sealed to prevent humid air from re-entering․ For models without a tank, a continuous drain option might be available – consult the diagrams for proper hose attachment․ Never operate the unit with a known leak until the source is identified and resolved․ Contact support if issues continue․