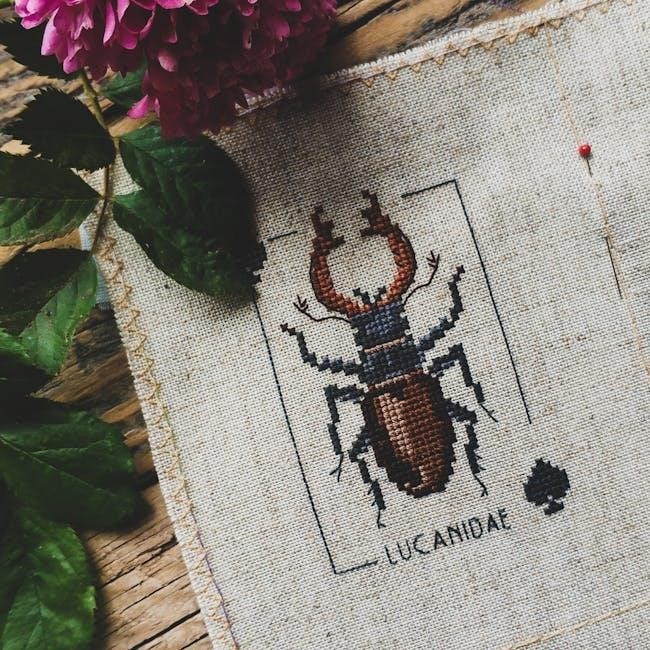
Cross stitch is a popular needlework craft that involves creating designs on fabric using X-shaped stitches. It’s portable, meditative, and offers a creative outlet for artistic expression while providing a sense of accomplishment with each completed project.
1.1 What is Cross Stitch?
Cross stitch is a traditional needlework craft where X-shaped stitches are sewn onto fabric to create intricate designs. It involves using embroidery floss and a needle to follow patterns, often printed on woven fabric. The craft is popular for its simplicity and versatility, allowing artists to create beautiful designs for home decor, gifts, or personal enjoyment. Cross stitch is typically worked on fabric stretched in a hoop, making it portable and easy to manage. The repetitive motion of stitching can be meditative, making it a relaxing and rewarding hobby for crafters of all skill levels.
1.2 Benefits of Cross Stitch for Beginners
Cross stitch is an excellent hobby for beginners, offering numerous benefits. It helps reduce stress and anxiety through its meditative stitching process. The craft fosters creativity and patience while providing a sense of accomplishment. Cross stitch is also a great way to develop fine motor skills and hand-eye coordination. Additionally, it’s an affordable and portable craft, making it easy to start and continue projects on the go. For those new to needlework, cross stitch is a rewarding introduction to embroidery, with its straightforward techniques and immediate visual results. It’s perfect for those seeking a relaxing and fulfilling creative outlet.
Gathering Supplies for Cross Stitch
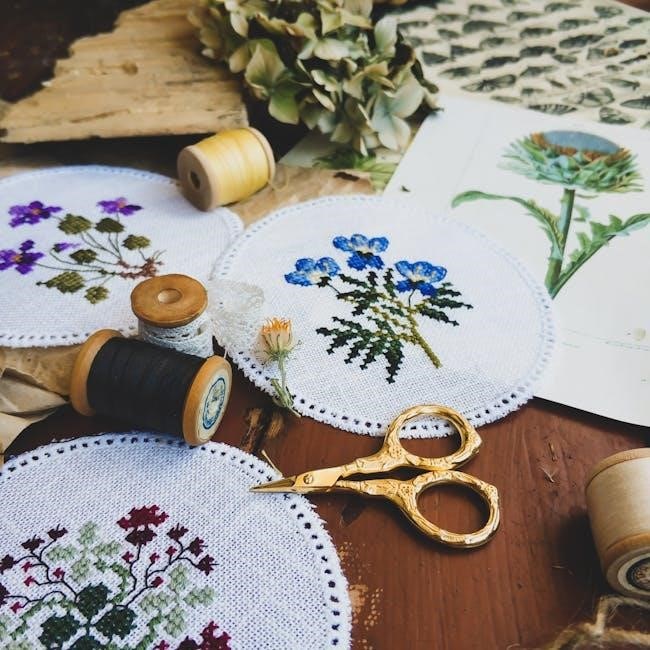
To start cross stitching, you’ll need essential materials like fabric, embroidery floss, needles, and hoops. These tools ensure a smooth and enjoyable stitching experience for beginners.
2.1 Essential Materials Needed
To begin cross stitching, you’ll need a few basic supplies. These include a cross stitch pattern, embroidery floss, a needle, fabric, and a hoop or frame. The fabric, often Aida or evenweave linen, provides the base for your stitches. Embroidery floss comes in various colors to match your pattern. A sharp needle with an eye big enough for the floss is essential. Scissors are needed for cutting the floss, and a hoop or frame helps keep the fabric taut, making stitching easier and more precise. These materials ensure you can start your project smoothly and achieve professional-looking results.
2.2 Choosing the Right Fabric
Selecting the right fabric is crucial for a successful cross stitch project. Aida cloth is a popular choice for beginners due to its evenly spaced holes, making it easy to count stitches. Evenweave linen is another excellent option, offering a smoother, more traditional stitching surface. Both fabrics come in various counts, such as 11, 14, or 18, referring to the number of threads per inch. A higher count fabric allows for finer details, while lower counts are better for larger designs. Always choose fabric that complements your pattern and skill level for the best results and a enjoyable stitching experience.
2.3 Selecting Embroidery Floss and Thread
Embroidery floss is a key component of cross stitch, available in a wide range of colors to match your pattern. High-quality floss ensures vibrant colors and durability. Opt for 100% cotton or cotton-blend threads for the best results. Many stitchers use thread conditioners or wax to minimize tangles and make stitching smoother. Always match the floss colors precisely to the pattern for an accurate design. Separate the strands gently to avoid knotting and use the recommended number of strands specified in your pattern. Proper thread selection enhances the overall appearance and stitching experience.
Preparing the Fabric
Preparing the fabric involves finding its center, stretching it tightly in a hoop, and securing it evenly. Ensure stability for smooth stitching.
3.1 Finding the Middle of the Fabric
Finding the middle of the fabric is crucial for ensuring your design is centered. Fold the fabric in half both vertically and horizontally, and lightly crease or iron it to mark the center. This step helps align your pattern evenly. For accuracy, you can also pin the center point or use a permanent marker to mark it. Once the middle is identified, you can secure the fabric in a hoop, ensuring it is taut and evenly stretched. This ensures your stitches will be consistent and the design will appear balanced. Proper alignment is key to achieving a professional finish.
3.2 Stretching and Securing the Fabric in a Hoop
To stretch and secure the fabric, place it over the inner hoop and gently tighten the outer hoop. Ensure the fabric is taut but not overly stretched to avoid wrinkles or distortion. Adjust the hoop evenly around the edges to maintain consistent tension. Once secured, the fabric should be smooth and stable, allowing for easy stitching. Properly securing the fabric in a hoop prevents it from shifting during stitching and ensures your design remains aligned. Regularly check the fabric’s tension to maintain even stitching and avoid puckering. This step is essential for achieving professional-looking results.
Understanding Cross Stitch Patterns
Cross stitch patterns guide stitchers through designs using symbols and colors. They include a legend to decode symbols and a list of required threads.
4.1 How to Read a Cross Stitch Pattern
A cross stitch pattern is typically represented on a grid, where each square corresponds to a stitch. Symbols or colors within the grid indicate specific thread colors. To read the pattern, match each symbol to its corresponding thread color using the provided key. The grid’s rows and columns guide the stitching sequence. Start by locating the center of the design, marked on the pattern, and work outward. Ensure all top stitches face the same direction for a neat finish. Consistency in following the pattern ensures the design aligns correctly and looks professional.
4.2 Interpreting Symbols and Colors
In cross stitch, symbols on the pattern grid represent specific thread colors. Each symbol corresponds to a unique hue, and the pattern key provides a legend for identification. Colors are often coded using letters, numbers, or distinct shapes. Fractional stitches, like quarter or half stitches, are marked with smaller symbols. Backstitch lines, shown as dashed or solid lines, indicate where to sew outlines. Understanding these elements ensures accurate stitching. Always refer to the pattern key for clarity, and consider using a highlighter to track your progress on the grid. This method helps maintain organization and avoids confusion while stitching.
Basic Cross Stitch Techniques
Mastering foundational stitches is essential for cross stitch. The full cross stitch is the primary stitch, while fractional and double stitches add detail and texture to designs.
5.1 The Full Cross Stitch
The full cross stitch is the fundamental stitch in cross stitch, forming an “X” shape on the fabric. To create it, bring the needle up at the center of the design area, insert it three threads to the right and down, then bring it back up three threads to the left and down. This completes one full cross stitch. Consistency in stitch direction is key for a neat appearance. Use a hoop to keep the fabric taut, ensuring even tension. This basic stitch is versatile and forms the foundation of most cross stitch patterns, making it essential for beginners to master.
5.2 Fractional Stitches
Fractional stitches are smaller than full cross stitches and are used to create details or curves in a design. They include quarter, half, and three-quarter stitches. To make a quarter stitch, insert the needle at the center and bring it up one thread in the desired direction. For a half stitch, extend the needle two threads diagonally. Three-quarter stitches combine elements of both. These stitches are essential for adding intricate details and shaping in cross stitch patterns. Keeping the fabric taut in a hoop helps maintain even tension. Practice these stitches to enhance your design’s precision and visual appeal.
5.3 Double Stitches
Double stitches are used to create thicker lines or fill larger areas in a design. They involve stitching two full cross stitches directly on top of each other, either horizontally or vertically. This technique adds texture and depth to your work. To stitch, complete a full cross stitch, then reinsert the needle through the same holes and repeat. Consistency in stitching direction is key for a neat appearance. Double stitches are ideal for backgrounds or bold details. Keep the fabric taut in a hoop to maintain even tension and avoid puckering. This stitch is versatile and enhances the visual impact of your design.
Tips and Tricks for Beginners
Cross stitch tips for beginners include managing thread, preventing tangles, and starting in the center. Use good lighting, keep fabric taut, and follow patterns closely.
One common mistake is miscounting stitches, leading to design misalignment. Using the wrong needle size or thread can also cause issues. Keep the fabric taut to prevent puckering and ensure all top stitches face the same direction for a neat finish. Regularly check your work against the pattern to catch errors early. Avoiding these pitfalls will help you achieve professional-looking results and make your cross stitch journey more enjoyable. Consistent tension and careful thread management are key to a flawless project. To keep your thread organized, cut lengths of about 18 inches for easier handling. Use a thread conditioner to prevent fraying and tangling. Wind excess floss on small cards or plastic bobbins to keep it tidy. Avoid pulling the thread too tightly, as this can cause puckering. When not in use, clip the thread close to the fabric or secure it with a pin to prevent tangling. Store threads in a cool, dry place to maintain their quality. Regularly checking and managing your thread will save time and reduce frustration during your cross stitching process. After stitching, remove the fabric from the hoop, trim excess thread, and wash gently. Iron on low heat from the back. Consider framing or sewing into a pillow for a polished finish. This completes your project. To remove the fabric from the hoop, gently release the tension by turning the screw counterclockwise. Carefully lift the fabric, ensuring it’s not stretched or distorted. If using a plastic hoop, slide the fabric off by widening the sides. For metal hoops, remove one side at a time. Handle the fabric with care to avoid creasing or bending the finished stitches. Once removed, your project is ready for washing and ironing before framing or sewing into a final product. This step ensures your work remains intact and pristine. Once your cross stitch project is complete, gently wash it in cold water with a mild detergent to remove dirt or oils from the fabric. Turn the piece inside out to protect the stitches. Avoid soaking, as it may cause colors to bleed. After washing, lay the fabric flat to air dry. Iron the piece on the reverse side while it’s slightly damp, using a low heat setting to prevent scorching. For even results, iron through a cloth. This step ensures your finished piece looks crisp and professional, ready for framing or sewing into a final product. Explore online tutorials and guides for cross stitch, join forums, and follow social media groups to connect with fellow stitchers, share projects, and gain inspiration. For beginners, online tutorials and guides provide step-by-step instructions to master cross stitch. Many resources include video links, patterns, and tips to simplify the learning process. Websites often offer free patterns and detailed explanations of stitches, from basic full cross stitches to fractional and double stitches. These guides also cover how to read patterns, interpret symbols, and manage thread effectively. Some platforms feature comprehensive guides with diagrams and step-by-step photos, making it easier for newcomers to understand and execute stitches confidently. Additionally, tutorials frequently include troubleshooting sections to help fix common mistakes, ensuring a smooth stitching experience for all skill levels. Joining cross stitch communities can enhance your stitching journey by connecting you with fellow enthusiasts. Online forums, social media groups, and local embroidery clubs offer platforms to share ideas, showcase projects, and gain inspiration. These communities often provide feedback, tips, and motivation to keep you engaged and improving. Many groups host events, workshops, and challenges that foster creativity and camaraderie. Being part of a community can help you stay updated on trends, learn new techniques, and overcome challenges with support from experienced stitchers. Engaging with these networks can make your cross stitch experience more enjoyable and rewarding.6.1 Avoiding Common Mistakes
6.2 Managing Thread and Preventing Tangles

Finishing Your Cross Stitch Project
7.1 Removing the Fabric from the Hoop
7.2 Washing and Ironing the Finished Piece
Additional Resources and Communities
8.1 Recommended Tutorials and Guides
8.2 Joining Cross Stitch Communities