
Converting a BMW E30 from automatic to manual transmission enhances driving experience‚ performance‚ and value. This guide provides a comprehensive overview of the process‚ benefits‚ and required steps.
Overview of the Process
The E30 auto-to-manual swap involves replacing the automatic transmission with a manual unit‚ typically the Getrag 260. Key steps include removing the automatic transmission‚ installing the manual gearbox‚ swapping the driveshaft‚ and modifying the pedal assembly. Additional tasks such as wiring adjustments‚ clutch system installation‚ and differential upgrades may be necessary. The process requires mechanical expertise and careful planning but offers significant improvements in performance and driver engagement.
Benefits of Converting to Manual Transmission
Converting the E30 to a manual transmission enhances driving enjoyment‚ offering better control and engagement. It improves fuel efficiency and increases the car’s value. The manual setup is lighter‚ reducing weight and enhancing performance. Additionally‚ it allows for a more connected driving experience‚ making the E30 more responsive and fun to drive. Many enthusiasts find the swap worthwhile for these improvements in both functionality and satisfaction;
Parts and Components Needed for the Swap
The essential components include a manual transmission‚ clutch‚ flywheel‚ spigot bearing‚ driveshaft‚ pedal assembly‚ master and slave cylinders‚ wiring harness‚ and differential upgrades. Sourcing these parts‚ often from donors‚ is crucial for a successful swap.
Essential Mechanical Parts
The core mechanical components required for the swap include the 5-speed Getrag 260 transmission‚ a compatible driveshaft‚ flywheel‚ spigot bearing‚ and clutch system. Additionally‚ the differential may need upgrading‚ and axles should be inspected or replaced. These parts ensure proper power transfer and compatibility with the manual setup. Sourcing these components‚ often from donor cars‚ is critical for a seamless conversion.
Electrical and Wiring Requirements
The electrical system requires minimal modifications‚ primarily involving the reverse switch and auto lockout. The wiring harness must be adapted to accommodate the manual transmission‚ ensuring proper connections for the reverse light and clutch switch. Additionally‚ the transmission cooler lines from the automatic setup can be removed‚ and the radiator ports should be capped to maintain system integrity. These adjustments ensure seamless integration of the manual transmission with the car’s electrical systems.

Transmission and Driveshaft Swap
Swapping the automatic transmission for a manual involves removing the auto unit and installing the manual transmission; The driveshaft must also be replaced with one from a manual car. This process requires lifting the vehicle‚ supporting the transmission‚ and carefully aligning the new components. Proper tools and mechanical knowledge are essential for a successful swap.
Removing the Automatic Transmission
Raising the car and supporting the transmission with a jack is essential. Disconnect the electrical connectors‚ cooler lines‚ and shifter linkage. Remove the mounting bolts and carefully lower the transmission. Draining the fluid beforehand is recommended. This step requires patience and proper tools to avoid damage. Ensure the area is clear and use a transmission jack for safe removal. Proper alignment and support are crucial during this process.
Installing the Manual Transmission
Position the manual transmission under the car‚ ensuring proper alignment with the engine. Use a jack or transmission jack for support. Align the input shaft with the clutch and pilot bearing. Secure the transmission with mounting bolts‚ tightening evenly. Connect the driveshaft and ensure all electrical connectors are properly attached. Double-check the alignment and connections for a smooth operation. Proper installation is critical for long-term reliability and performance.
Driveshaft Replacement and Alignment
Replace the automatic driveshaft with a manual-specific unit‚ ensuring proper length and compatibility. Remove the old driveshaft‚ taking care not to damage surrounding components. Install the new driveshaft‚ aligning it with the transmission and differential flanges. Secure it with the center support and bolts. Check the balance and alignment to prevent vibration. Proper installation ensures smooth power delivery and prevents premature wear on drivetrain components.
Pedal and Clutch Setup
Replacing the pedal assembly with a manual-specific setup‚ including the clutch master and slave cylinders‚ is essential. Proper installation ensures smooth clutch engagement and disengagement.
Replacing the Pedal Assembly
Replacing the pedal assembly is crucial for manual transmission functionality. The automatic brake pedal must be swapped with a manual-specific pedal assembly‚ including the clutch pedal. This involves installing the master cylinder and slave cylinder‚ ensuring proper hydraulic connection. Alignment of the pedals and linkage is critical for smooth clutch engagement. The process requires careful disassembly of the automatic components and precise installation of the manual setup to maintain proper pedal feel and operation.
Installing the Clutch System
Installing the clutch system involves fitting the flywheel‚ pressure plate‚ and clutch disc onto the crankshaft. Ensure proper alignment using a clutch alignment tool. The pilot bearing must be installed in the center of the crankshaft to guide the input shaft. Connect the clutch slave cylinder to the pedal assembly‚ ensuring hydraulic lines are securely attached. Bleed the system to remove air bubbles for consistent clutch engagement. Proper installation ensures smooth operation and prevents premature wear on components.
Electrical and Wiring Modifications
Adapt the wiring harness to accommodate manual transmission components‚ focusing on the reverse switch and clutch safety switch connections to ensure proper electrical functionality and compatibility.
Adapting the Wiring Harness
Adapting the wiring harness is crucial for a smooth manual swap. Focus on connecting the reverse switch and clutch safety switch. Minimal wiring changes are needed‚ primarily involving the reverse light circuit and auto lockout disengagement. Ensure proper connections to avoid electrical issues. Consult a wiring diagram for accuracy and consider professional help if unsure. This step ensures seamless integration of manual transmission components with the vehicle’s electrical system.
Connecting the Reverse Switch
Connecting the reverse switch is essential for proper functionality. Locate the manual transmission’s reverse switch and wire it to the vehicle’s electrical system. Ensure the switch is securely mounted and connected to the reverse light circuit. Test the connection to confirm the lights activate when reverse gear is engaged. This step ensures proper functionality and safety during reversing maneuvers. Consult a wiring diagram for precise connections and troubleshooting tips.
Cooling System Adjustments
Modify the radiator by removing the automatic transmission cooler lines and capping the holes to prevent leaks‚ ensuring proper cooling system functionality without the automatic transmission.
Modifying the Radiator and Cooler Lines
Remove the automatic transmission cooler lines from the radiator and cap the ports to prevent leaks. This ensures the cooling system functions properly without the automatic transmission. Additionally‚ inspect the radiator for any damage or corrosion and clean or replace it if necessary. Properly sealing the cooler line ports maintains system integrity and prevents coolant loss. This modification simplifies the cooling system and reduces potential failure points‚ ensuring reliable operation after the manual swap.

Differential and Axles
Upgrading the Differential
Upgrading the differential is essential for a manual swap. The manual transmission requires a compatible differential to maintain proper gear ratios and performance. Source a differential from a compatible model‚ such as an M3‚ and ensure it is installed correctly. This step ensures the drivetrain operates smoothly with the new manual setup. Additionally‚ inspect and replace axles if necessary to guarantee reliability and performance.
Inspecting and Replacing Axles
Inspecting and replacing axles is crucial during an E30 auto-to-manual swap. The axles must be compatible with the new manual transmission and differential. Check CV joints and boots for wear or damage. If damaged‚ replace them with axles from a manual E30. Proper installation ensures smooth power delivery and prevents vibration. This step guarantees reliability and performance‚ complementing the upgraded differential for a seamless driving experience.
Shifter Installation
Shifter installation involves fitting the manual shifter assembly and adjusting the linkage for proper function. This ensures smooth gear shifts and precise control over the transmission.
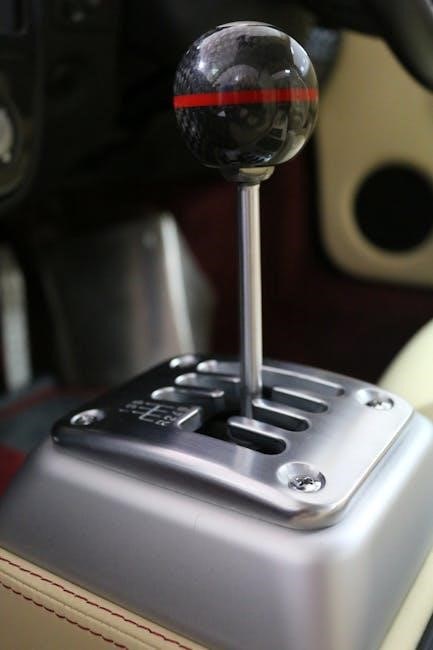
Fitting the Manual Shifter
Fitting the manual shifter involves removing the automatic shifter assembly and installing the manual unit. This requires aligning the shifter with the transmission and securing it properly. Ensure all bolts are tightened to specifications. Proper alignment ensures smooth gear engagement. Some modifications to the center console may be needed for a clean install. Follow manufacturer guidelines for precise installation.
Adjusting the Shifter Linkage
Adjusting the shifter linkage ensures precise gear engagement. Loosen the bolts at the transmission end‚ align the linkage with the shifter‚ and tighten securely. Test the shift action to confirm smooth operation. Proper adjustment prevents misalignment and improves driving experience. Ensure all connections are secure to avoid slippage or wear. This step is critical for optimal transmission functionality and driver control.
Testing and Troubleshooting
Post-swap‚ conduct a thorough test drive to ensure smooth gear shifts and proper clutch engagement. Common issues include misalignment or worn components‚ requiring immediate attention.
Initial Test Drive
After completing the swap‚ a thorough test drive is essential to ensure smooth operation. Check for proper shifting‚ clutch engagement‚ and any unusual noises. Address any issues promptly. This step confirms the success of the swap and highlights areas needing adjustment. A well-executed test drive ensures reliability and optimal performance‚ making the manual transmission conversion both enjoyable and functional.
Common Issues and Solutions
Common issues include improper clutch engagement‚ misaligned driveshafts‚ and wiring faults. Ensure the clutch system is installed correctly and the driveshaft is properly fitted. Electrical issues like faulty reverse switches can cause problems. Inspect and replace worn components‚ and consult manuals or forums for solutions. Addressing these issues promptly ensures a smooth transition to manual transmission‚ enhancing overall performance and reliability of the vehicle.
Completing the E30 auto-to-manual swap brings a sense of accomplishment and enhanced driving dynamics. It’s a rewarding project that boosts car value‚ mileage‚ and driver engagement. Plan meticulously and enjoy the improved performance!
Final Thoughts and Recommendations
Converting your BMW E30 to a manual transmission is a challenging yet rewarding project. It enhances performance‚ driving engagement‚ and car value. Plan meticulously‚ source quality parts‚ and consider professional help if needed; The end result offers improved control‚ better mileage‚ and a more authentic driving experience. Stay patient‚ detailed‚ and prepared for unexpected challenges. The satisfaction of completing the swap makes it well worth the effort and time invested.